When you’ve built thousands of websites every day, you start to notice some things. And we’ve seen over and over again that even 10 minutes of minor adjustments can make a big difference in how well your website performs – and those 10 minutes can be the difference between good and great, even on the Launch Plan.
To really make sure your page succeeds to the best of its abilities, you’ll want to make sure you follow this checklist and turn a wonderful introductory page into something that really captures what makes your business special. Don’t forget – you can edit on your computer, your phone, or a tablet, whatever’s easiest for you.
Double Check Your Basic Information
First thing’s first: let’s make sure all the key information about your business is correct on the page.
When you signed up with us, you filled out the information that we used to create your website. Now it’s time to double-check and make sure that all of your information is properly displayed on your page. Having the correct information on your page, as well as good photos and descriptions, can be the difference between booking a customer and not.
So, what information should you double-check?
Your Header
Your website header is the first thing customers see when they land on your site, so it’s important to give it a good look once your UENI website is live. Remember, first impressions count!
Take a look to make sure that the header image is to your liking, as well as making sure that the business name, your logo, and title are correct, plus any contact information (like your WhatsApp number or email).
Take a moment to look over this part of your page and make sure all of it is to your liking.
Simply log into your Hub and select the Edit Website tab. You can edit all of these elements on the Sections > Header page in the Editor.

Opening Hours
No matter what sort of business you run, it’s important to make sure that your opening hours accurately reflect when your shop or company is open – yes, even if you’re an online shop. This info is displayed on your business page and is also displayed on your Google My Business account, which helps local people find your business.
The opening hours are also used to power our Booking Tool, so if you have no opening hours displayed your customers will not be able to book time with you.
How do I check and change my Opening Hours?
You can simply edit the opening hours displayed on your site by logging into your Hub and the Editor, then click Sections and scroll down to Opening Hours. You can use this section to:
- Edit or remove your opening hours.
- List your business as open or closed on certain days, using the blue checkbox icon.
You are free to change the header of this section by modifying the Opening Hours Title.
Make sure the green button next to Opening Hours is turned on.

You can also choose to display your timings in AM/PM or in 24-hour format by toggling the following option:

If you would like to show that your business is open 24/7, simply change the opening time to 12:00AM and closing time to 11:59PM. Here’s how this will look like:

Is Your Address Correct?
For storefront businesses, the importance of a correct address is clear: if you’re relying on customers to visit you in person, they need to be going to the right place!
Even if you don’t have a storefront that people want to visit, making sure that you’ve correctly listed the areas that you cover is essential to helping people know if your services or products are available to them.
Is Your Online Presence Represented?
In 2020, it’s rare to find a business that only has one method of representation on the internet. From social media like Twitter, Facebook, and Instagram to other websites, your customers want to get an idea of what your business is about from multiple outlets – so if you’ve got a really great IG presence or have a bunch of great Etsy reviews, link them on your website! It’ll help Search Engines and customers get a better understanding of your business.
Stand Out with a Custom Domain and a Professional Email
A custom domain name is your website’s individual address on the web. It helps people find you online, makes your website look more reputable, and professional to the world. You can put it on business cards, documents, marketing materials – anywhere people can see it.
No matter what industry you’re based in, online competition is fierce. Everyone and their grandmother has a website so it is essential to distinguish yourself if you are to have a long line of customers knocking at your door.
You want to be at the front of potential customers minds when they search for services/products like yours. To do this, it is essential to have a memorable domain name. Make it too complicated and users will just go somewhere else.
In other words, it’s the difference between barrythebarber.ueniweb.com and barrythebarber.com
The same goes for emails. When someone books an appointment with you, are they going to be more impressed by coolbusiness123@free-email.com or CEO@your-business.com?
The answer is obvious.
How To Choose a Custom Domain
When you log into your UENI Hub, you’ll see a big purple Choose Domain button under your Pro Features Page (it also appears in the hub).
Once you click Chose Your Free Domain, a search bar will pop up that you can use to search for the domain name you want (e.g. yourbusinessname.com). This will check if the URL you want is available:

Here you’ll be able to see whether the domain name you’ve selected is available, as well as our recommended options. Make sure you double-check your spelling and choose your domain carefully, because changing it later will not be free.
Not happy with the results? Just hit Search Again to see some different options.
When you’ve made up your mind, just click Confirm Selection to finish up.
All done! Keep in mind, it can take up to 72 hours for your new domain to point to your UENI website.
How To Choose A Custom Email
Once your domain name is live, it’s time to set up your professional email.
If you’re on the UENI Launch Plan, you can select one professional email addresses for your business.
Just like the Domain, this is available under the Pro Features section:
All you have to do is fill in your desired email name and a password, then click Submit.
See the example below on how to pick an email handle (e.g. ‘info’). In this instance, we’ve selected info@choose-your-domain.com.
Once your email address has been successfully set up, you’ll see a confirmation in the hub as shown in the example below.
To access your new email account, use the Go to my Email button on your Hub, or click here to access the UENIMail login page.
Use the email address and the password you selected to login to your new email account.
Make the Page Your Own
At UENI, we see hundreds of small business websites every day, and we’ve figured out the best way to make your website stand out against the competition. Our top-performing businesses have a few things in common, but one thing in particular really makes these websites pop – great photos, detailed service descriptions, and great information about the business.
We built your website to the highest standard we could, but the truth is that we’re website builders, not mind readers. When you receive your website from us, you’re looking at a good representation of your business, but only you can make it a great one.
Choose Your Theme
Want more than our Origins theme? Changing your theme can be a great way to give your business website a facelift, or to highlight specific aspects of your business more prominently.
For our subscribers, UENI offers the following selection of premium templates:

If you want to test it on your page, head to your Editor and choose the Theme tab.
Add High-Quality Images to your Page
What makes a great image? Two things: Size and resolution. The size refers to the dimensions of the image, and the resolution refers to the quality – you can change the size of any image to fit the dimensions we suggest, but the image might look pixelated and otherwise incorrect.
Your Logo
A logo is an essential part of your business’s identity, and it’ll be prominently displayed on your business header. As such, it’s important that you make sure your logo looks great on your website. It’s also important to know that the best size for a logo is 200 pixels by 200 pixels.
When resizing your logo, it’s important to consider any space around the logo.
As you’ll see below, both of these images are about 200 by 200, but the first image has considerably more white space around the outside of the image than the second
So when you go to upload them, you see that the logo is much smaller on the page:
![]()
Don’t have a logo? You can Click Get My Logo below the upload button to have one made for you.
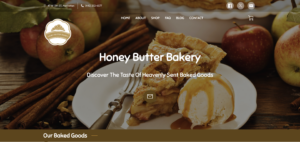
Your Cover Image
The cover image is the large image at the top of your website – so it’s the first thing users will see when they land on your page.
In other words: if you can only spend time on one image: make it your cover. The ideal formatting for this image is 1900 by 500 pixels – in other words, it’s going to be a landscape image, wider than it is tall.
Just like with the Logo Image, it’s very important to get the image as close as possible to these dimensions to ensure that your website looks great on mobile devices as well as desktop computers.
If you don’t have a properly formatted image ready, don’t worry. high-quality images will also work, as long as the image has a strong central focus, like so:
Curate your Photo and Video Gallery
Your Gallery is the place where you can really show off what makes your business shine. No matter if you’re creating, plating, designing, or building: great photos of your work can leave a huge impact on potential customers.
Our minimum image size for the gallery is 1024 x 300 pixels, and with your Launch plan, you can upload as many pictures as you want.
To add images to your Gallery, head into the Editor, then, head to Sections and select Gallery:
If you want to upload a new image (that you didn’t provide during your signup), you’ll want to select the Upload image option to upload a new image. You can upload images directly from your own device, or via an external URL.
Besides unlimited image hosting, your Launch plan also gives you the option to upload videos to your Gallery.
To take advantage of this, your video must be uploaded to Youtube or Vimeo. If you’ve uploaded your video on one of these platforms, you can add it to your Gallery by opening the Editor, heading to Sections and choosing Gallery. Once you’re there, head to Video Library, paste your video’s URL and click Import.
When your video appears, you have to choose it and click on Add to Gallery. Don’t forget to save!
Adding an About Us and Service & Product Descriptions
Not only are service and product descriptions key for SEO optimisation – search engines love it when you have prices, great photos, and a really well-rounded description on the page because it makes it easy to understand the page – they’re also key to establishing trust with your customers.
In other words: it’s absolutely important to make sure you describe your business the best way you can! No one knows your business better than you, so why not tell your story?
About Us
The About Us (Or About Me) section exists to help your customers really understand your business. From how long you’ve been in business to anything exceptional about the work that you do or the services you offer – this is the place to let the world know whatever you want to let them know about your company.
If you’d prefer to watch a video to learn how to edit this page, click here
When we created your UENI page, we added some business-specific content based on the information you provided, but feel free to rewrite it or replace it entirely. The choice is yours.
Once you’re in the Editor, head to Sections and click the About section. From there, you’ll see a field that says About Me Title, and one that says + New Content Block. Each New Content Block has fields for text and images, as you’ll see below:
Now, you’ll notice that there was the option to upload a picture. What’s the difference between a content block with a picture and without one? Let’s see:
Personally, we think it looks better with an image, but if you’d rather leave images out of this section, you can!
Please Note: you can add as many Content Blocks as you’d like to your page. By default, we give your business three, but that’s by no means the limit.
Service & Product Descriptions
Service and Product Descriptions are very similar to the content blocks that make up your About Us or About Me section – the biggest difference is that they’re made up of two sections: Groups and Individual offerings.
Think about it this way: Groups are the category of the work being done, while the individual elements are the specific services you offer.
In other words, for our bespoke calligraphy page, we would have one section for Calligraphy and one specific service for the types of Calligraphy that we offer. So if the business does both Thank You Cards and Chinese Calligraphy, you would add in Chinese Calligraphy as part of that service group.
When you’re in Sections, you’ll want to head to Services & Products. From there you can title your service section overall (we’ve named ours Our Calligraphy) and create Service Groups. For our first service group, we’ve created one called Calligraphy Services, but if we also sold custom clothing, we’d put that in a separate group.
Clicking into Caligraphy Services, we can add a new service. Let’s add Chinese Calligraphy now:
By making sure that your product or service description is fully explained, well written, and creatively put together, you’re increasing your chances of turning people who are casually browsing your site into customers. Combined with a great product or service photo, anyone who has landed on this page will have all the information they need about whether or not this offering is the right fit for them.
Adding Testimonials
Testimonials are reviews left by your customers about your business, whether they’re talking about a service you gave them or something they bought from you, they’re one of the key elements of your page when it comes to establishing trust.
If you have headshots from your customers, you can use those – this can be particularly useful if you’re a hairdresser, a clothing shop, or a tattoo artist – but you can also use images of the products that your clients buy from you if you prefer: both look great on the page, and will do a lot to make your page stand out.
Reorganising Your Page
When we finish your website, we’ve set it up in a way that makes the most sense for most businesses, but you can rearrange it in any way you like.
To move sections around:
1. From your editor menu, hit Sections
2. Press the Edit option in the top right corner.
3. Now, just click and hold the hamburger icon (☰) to move your sections around.
When you’re happy with your section order, hit Save to apply your changes.
Create Custom Amenities
Amenities can be a powerful tool for communicating the essential elements of your business in a quick, concise way. These are the things about your business that prospective customers will want to know at a glance – Do you take cards? Is there on-site parking? Wi-fi? Our default amenities list can help you get this information to customers as quickly as possible.
But that’s not the only thing you can do with this space. Buy using our custom Amenities function, you can list anything you want; qualifications, particular arrangements that can be made (if you offer curbside pickup or contact-free delivery because of COVID, for example), or other unique aspects of your business.
To Edit your Amenities:
1. Log in to the Editor.
2. Click on Sections and select Amenities.
3. Choose from our existing list of amenities or enter your own text under “Custom Amenities”
4. Please press “+Add” for the feature to be added to the list.
Make sure to press Save at the bottom of the page to save any changes you make.
Don’t Forget About Seasonal/Holiday Promotions
Announcement banner is a great way to draw attention to offerings, products, sales and other things that you want to show off. Have a Buy One, Get One Free deal going? Add it to your announcement!
Odds are, though, that you’ll want to run several different promotions over the year. By tying your promotions to seasonal events & holidays – Christmas, New Years, Spring, Summer, and the like – you can rotate your promotions in such a way that will keep up to trend with the calendar. What does this do? It shows people your site is actively maintained and active, plus it allows you to highlight any new and exciting sales or offers you may have lined up.
Announcements banners are a great way to grab your visitors’ attention and effectively communicate important messages, promotions, or updates right at the top of your website. That’s why we’ve made editing your announcement banners super simple, so you can update your offers whenever you like.
For more information about how to add announcement banners to your sites, visit our article here!
What’s Next? Marketing Your Page
Now that you’ve made your site the best it can be, how are YOU going to get the word out about your website? Every business is different, but there are some steps every page can take advantage of.
Advertise the page on Social Media
Currently, there are 2.77 billion social media users worldwide and this number shows no sign of slowing down. When it comes to promoting your business, having a social media is a definite must. If you do it right, you’ll be able to reach millions of people at once.
Nevertheless, try not to use every social media channel out there. Select only the relevant ones that your clients frequent as this will help you connect with them more directly.
For example, you could open an Instagram account and share beautiful and eye-catching photos of your products. Alternatively, you could use a Twitter account to showcase your expertise and position your brand as a leader in the field. It all depends on the platforms that best fit your audience.
If you need any further assistance, please message our support team or get real-time help on our Live Chat!